
In this article, we will explore the details of the Flood Fill algorithm, with its implementation using stack and queue. It has numerous applications in computer graphics and image processing.
Flood Fill Algorithm
The Flood Fill algorithm is a popular technique used to fill an area of a bitmap or an image with a specified color. The algorithm works by starting at a pixel location and then recursively checking its neighbors until the entire area has been filled.
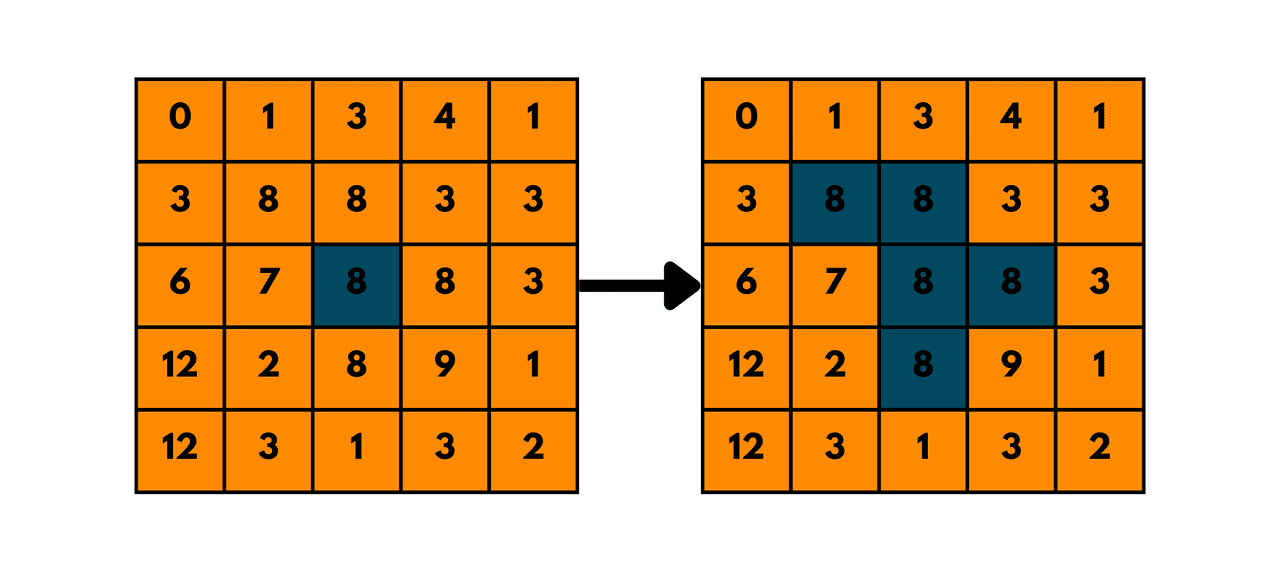
It is a recursive algorithm that works on a 2D grid of pixels. The basic algorithm can be described in the following steps:
- Choose a starting pixel.
- Check if the color of the starting pixel is the same as the target color.
- If the color of the starting pixel is the same as the target color, fill it with the replacement color and mark it as visited.
- Recursively call the Flood Fill algorithm on each unvisited neighboring pixel that has the same color as the starting pixel.
Flood Fill Algo Example
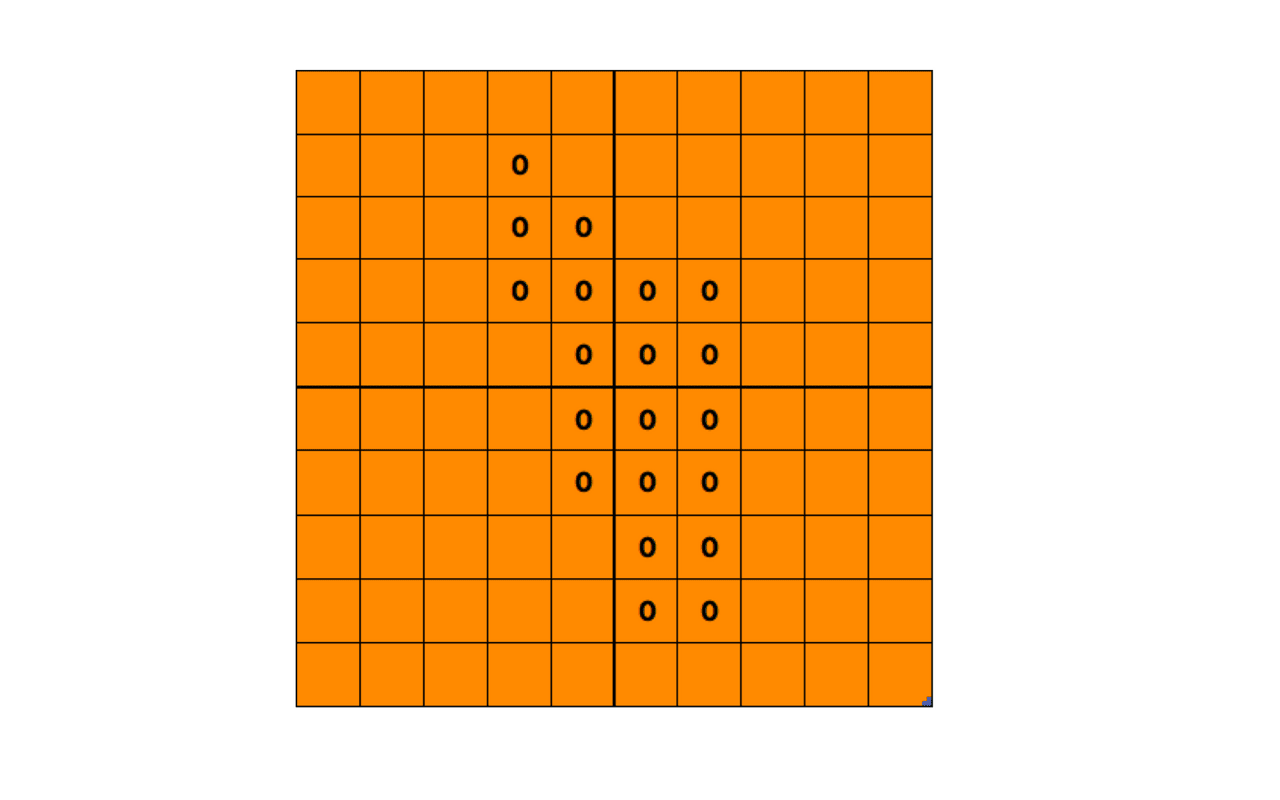
Let's take an example of the Flood Fill algorithm to understand how it works. Consider the following 10x10 grid of pixels:
Suppose we want to fill the area enclosed by the three 'o' pixels with a blue color. We can start the Flood Fill algorithm from any of the 'o' pixels. Let's start from the top-left 'o' pixel.
Step 1: Check the color of the starting pixel. It is 'o', which is the same as the target color.
Step 2: Fill the starting pixel with the replacement color (blue) and mark it as visited.
Step 3: Recursively call the Flood Fill algorithm on each unvisited neighboring pixel that has the same color as the starting pixel.
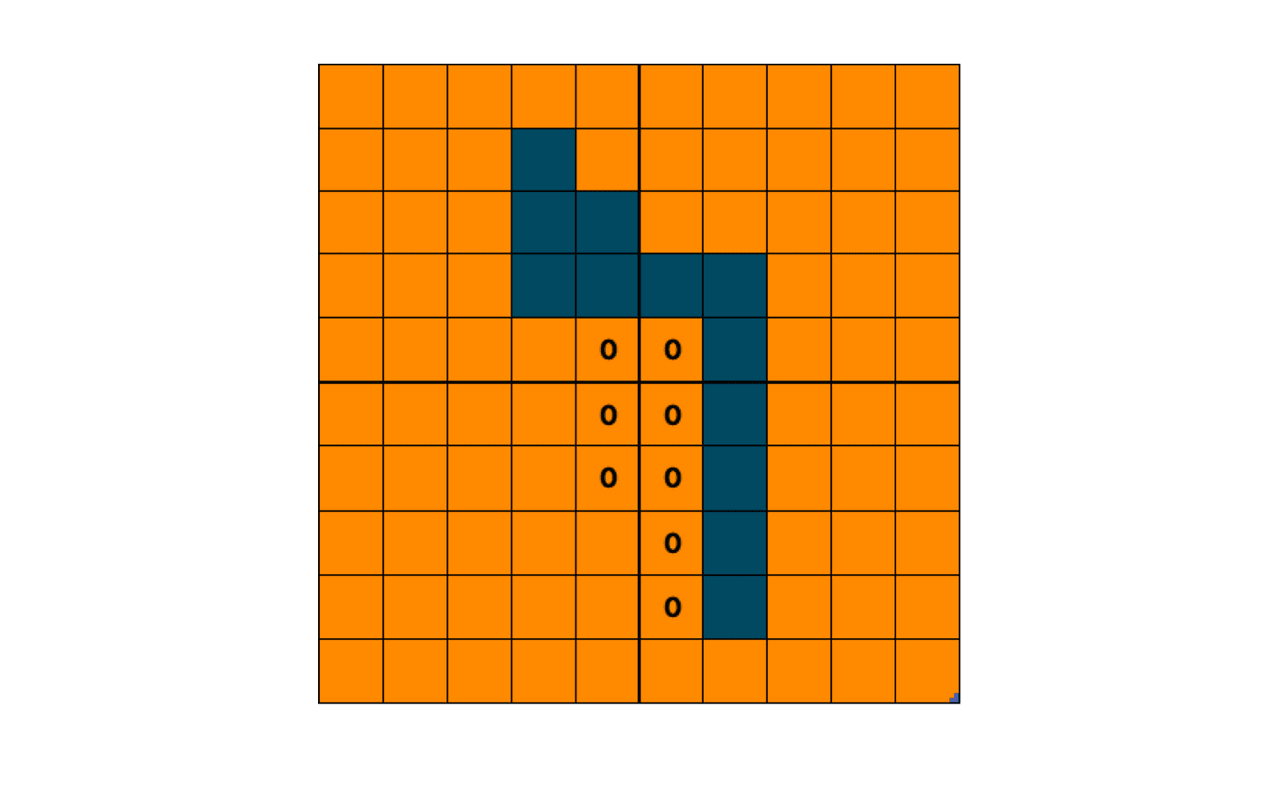
The Flood Fill algorithm fills all the neighboring 'o' pixels until it cannot find any more unvisited pixels. The final result is the following:
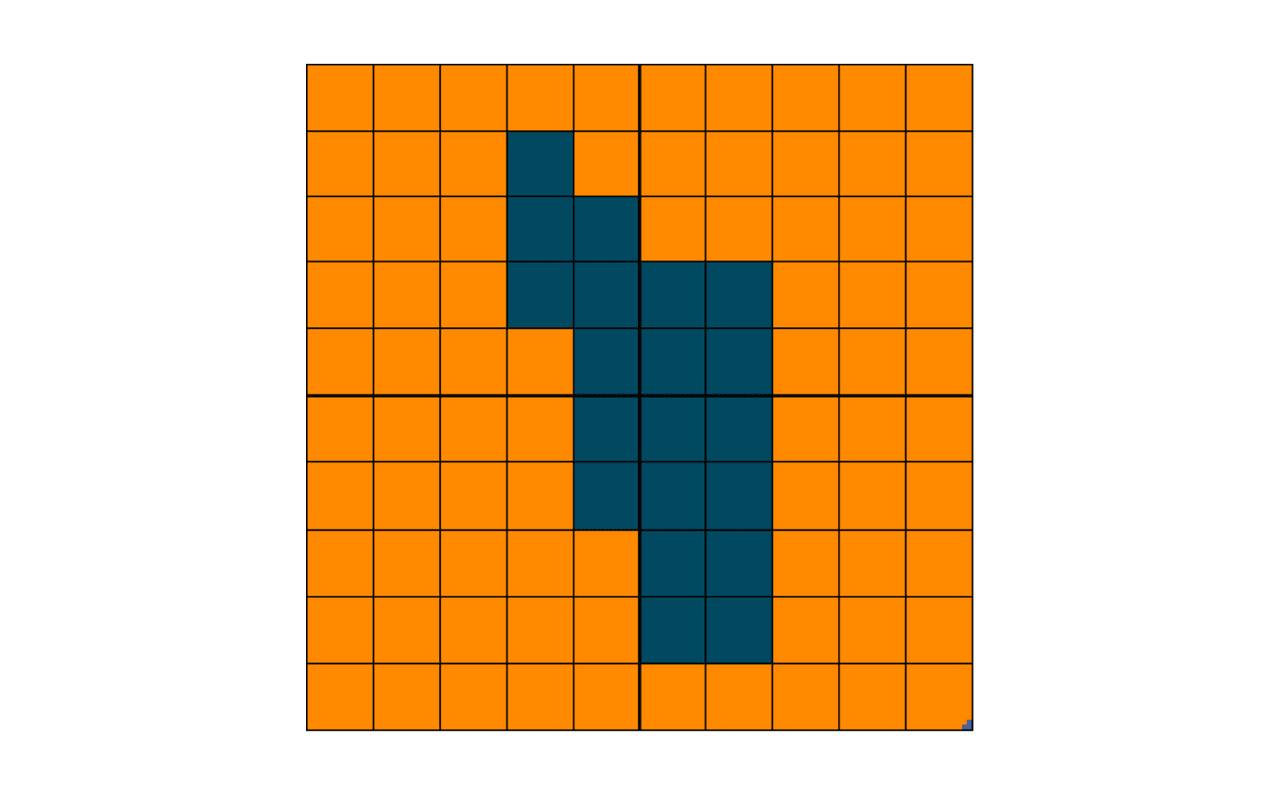
As we can see, the Flood Fill algorithm has filled the area enclosed by the three 'o' pixels with blue color. This is just a simple example, but the Flood Fill algorithm can be used to fill more complex shapes and images with different colors.
The Flood Fill algorithm can be implemented using a stack or a queue. The choice of data structure depends on the specific implementation. A stack-based implementation is known as Depth-First Flood Fill (DFFF), while a queue-based implementation is known as Breadth-First Flood Fill (BFFF).
The 'DFFF' implementation of the Flood Fill algorithm starts at a specific pixel and fills the adjacent pixels in a depth-first order until the entire area has been filled. The 'BFFF' implementation, on the other hand, fills the adjacent pixels in breadth-first order.
Boundary Fill Algorithm
The Boundary Fill algorithm is a variation of the Flood Fill algorithm that fills an area bounded by a specific color. The algorithm works by starting at a pixel on the boundary of the area and filling the area enclosed by that boundary with the replacement color.
The Boundary Fill algorithm can be implemented using the Flood Fill algorithm with an additional check for the boundary color. The algorithm starts at a pixel on the boundary and checks if the color of the current pixel is the same as the boundary color.
If it is, the algorithm fills the pixel with the replacement color and then recursively calls the Flood Fill algorithm on each neighboring pixel that has the boundary color.
C++ & Python Implementation
Here is the code for Flood Fill Algorithm in C++ using the DFS strategy:
// Online C++ compiler to run C++ program online
#include <bits/stdc++.h>
using namespace std;

void floodFillUtil(int x, int y, int targetColor, int replacementColor, vector<vector<int>>& image) {
    int rows = image.size(), cols = image[0].size();
    if (x < 0 || x >= rows || y < 0 || y >= cols) {
        return;
    }
    if (image[x][y] != targetColor) {
        return;
    }
    image[x][y] = replacementColor;
    floodFillUtil(x-1, y, targetColor, replacementColor, image);
    floodFillUtil(x+1, y, targetColor, replacementColor, image);
    floodFillUtil(x, y-1, targetColor, replacementColor, image);
    floodFillUtil(x, y+1, targetColor, replacementColor, image);
}

void floodFill(int x, int y, int replacementColor, vector<vector<int>>& image) {
    int targetColor = image[x][y];
    if (targetColor != replacementColor) {
        floodFillUtil(x, y, targetColor, replacementColor, image);
    }
}
 int main(){
     vector<vector<int>> image=
     { {1,1,1,1,1,1,1,1,1,1},
       {1,1,1,1,1,1,1,1,1,1},
       {1,1,1,1,1,0,0,1,1,1},
       {1,1,1,0,0,0,0,0,1,1},
       {1,1,1,0,1,0,0,1,1,1},
       {1,1,1,0,0,1,0,1,1,1},
       {1,1,1,0,0,0,0,1,1,1},
       {1,1,0,0,0,1,1,1,1,1},
       {1,1,1,1,0,1,1,1,1,1},
       {1,1,1,1,1,1,1,1,1,1} };

       int replacementColor = 2;

       cout<<"Original Image :"<<endl;
       //print original matrix;
       for(int i=0; i < image.size(); i++){
           for(int j=0; j < image[0].size(); j++){
               cout<<image[i][j]<<" ";
           }
           cout<<endl;
       }
       cout<<endl;
       floodFill(3, 3, replacementColor, image);

       cout<<"\nColored Image:"<<endl;
       //print coloured matrix;
       for(int i=0; i < image.size(); i++){
           for(int j=0; j < image[0].size(); j++){
               cout<<image[i][j]<<" ";
           }
           cout<<endl;
       }
       cout<<endl;
     return 0;
 }
Output:
Original Image :
1 1 1 1 1 1 1 1 1 1
1 1 1 1 1 1 1 1 1 1
1 1 1 1 1 0 0 1 1 1
1 1 1 0 0 0 0 0 1 1
1 1 1 0 1 0 0 1 1 1
1 1 1 0 0 1 0 1 1 1
1 1 1 0 0 0 0 1 1 1
1 1 0 0 0 1 1 1 1 1
1 1 1 1 0 1 1 1 1 1
1 1 1 1 1 1 1 1 1 1


Colored Image:
1 1 1 1 1 1 1 1 1 1
1 1 1 1 1 1 1 1 1 1
1 1 1 1 1 2 2 1 1 1
1 1 1 2 2 2 2 2 1 1
1 1 1 2 1 2 2 1 1 1
1 1 1 2 2 1 2 1 1 1
1 1 1 2 2 2 2 1 1 1
1 1 2 2 2 1 1 1 1 1
1 1 1 1 2 1 1 1 1 1
1 1 1 1 1 1 1 1 1 1
This implementation uses recursion to fill neighboring pixels i.e. it uses the DFS strategy. The floodFill() function takes the starting pixel coordinates (x and y), the replacement color, and the image as a 2D vector of integers. It also calculates the target color to be replaced by accessing the pixel at (x, y) in the image.
The floodFillUtil() function is a helper function that takes the same arguments, along with the target color. It checks if the pixel at (x, y) has the same color as the target color, and if so, it replaces it with the replacement color. Then it recursively calls itself on the neighboring pixels to fill them as well.
Note that this implementation assumes that the image is rectangular and that all rows have the same length. If your image has a different format or size, you may need to modify the code accordingly. Also, keep in mind that the use of recursion can cause stack overflow errors for large images, so it's important to test the code thoroughly and optimize it if necessary.
Here is the Similar Code in Python:
def flood_fill_util(x, y, target_color, replacement_color, image):
    rows, cols = len(image), len(image[0])
    if x < 0 or x >= rows or y < 0 or y >= cols:
        return
    if image[x][y] != target_color:
        return
    image[x][y] = replacement_color
    flood_fill_util(x-1, y, target_color, replacement_color, image)
    flood_fill_util(x+1, y, target_color, replacement_color, image)
    flood_fill_util(x, y-1, target_color, replacement_color, image)
    flood_fill_util(x, y+1, target_color, replacement_color, image)

def flood_fill(x, y, replacement_color, image):
    target_color = image[x][y]
    if target_color != replacement_color:
        flood_fill_util(x, y, target_color, replacement_color, image)

if __name__ == "__main__":
    image = [ [1,1,1,1,1,1,1,1,1,1],
       [1,1,1,1,1,1,1,1,1,1],
       [1,1,1,1,1,0,0,1,1,1],
       [1,1,1,0,0,0,0,0,1,1],
       [1,1,1,0,1,0,0,1,1,1],
       [1,1,1,0,0,1,0,1,1,1],
       [1,1,1,0,0,0,0,1,1,1],
       [1,1,0,0,0,1,1,1,1,1],
       [1,1,1,1,0,1,1,1,1,1],
       [1,1,1,1,1,1,1,1,1,1] ];


    x = 3
    y = 3
    m=10
    n=10
    replacement_color=2
    print("Original Image: \n")
    for i in range(m):
        for j in range(n):
            print(image[i][j], end=" ")
        print()
    flood_fill(x, y, replacement_color, image)

    # Printing the updated screen
    print("\nColored Image: \n")
    for i in range(m):
        for j in range(n):
            print(image[i][j], end=" ")
        print()
Output:
Original Image:

1 1 1 1 1 1 1 1 1 1
1 1 1 1 1 1 1 1 1 1
1 1 1 1 1 0 0 1 1 1
1 1 1 0 0 0 0 0 1 1
1 1 1 0 1 0 0 1 1 1
1 1 1 0 0 1 0 1 1 1
1 1 1 0 0 0 0 1 1 1
1 1 0 0 0 1 1 1 1 1
1 1 1 1 0 1 1 1 1 1
1 1 1 1 1 1 1 1 1 1

Colored Image:

1 1 1 1 1 1 1 1 1 1
1 1 1 1 1 1 1 1 1 1
1 1 1 1 1 2 2 1 1 1
1 1 1 2 2 2 2 2 1 1
1 1 1 2 1 2 2 1 1 1
1 1 1 2 2 1 2 1 1 1
1 1 1 2 2 2 2 1 1 1
1 1 2 2 2 1 1 1 1 1
1 1 1 1 2 1 1 1 1 1
1 1 1 1 1 1 1 1 1 1
Time & Space Complexity
The time and space complexity of the Flood Fill algorithm depends on the size and shape of the input image and the number of pixels to be filled. Here's an analysis of the worst-case time and space complexity of the algorithm:
Each pixel can be visited at most once, so the time complexity of the algorithm is O(N), where N is the total number of pixels in the image.
The space complexity of the algorithm depends on the maximum depth of the recursive call stack. In the worst case, the entire image can be filled, so the maximum depth of the recursive call stack can be equal to the number of pixels in the image. Therefore, the space complexity of the algorithm is O(N), where N is the total number of pixels in the image.
In practice, the time and space complexity of the Flood Fill algorithm can be optimized by using non-recursive approaches such as using a queue or stack to keep track of the pixels to be filled, or by using iterative methods.
Advantages & Disadvantages
Let's take a look at the advantages of the flood fill algorithm:
- Easy to implement: The Flood Fill algorithm is relatively simple to implement, and the code can be written in a few lines. It only requires basic knowledge of data structures and recursion.
- Fast processing: The algorithm processes pixels in a recursive manner, which makes it fast for small and medium-sized images. It can also be optimized for larger images by using more efficient data structures.
- Fills complex shapes: The algorithm is capable of filling complex shapes, such as irregular polygons or regions with holes, without requiring manual intervention. This makes it a valuable tool for computer graphics and image-processing applications.
- Can be modified for different applications: The Flood Fill algorithm can be modified and extended for different applications, such as boundary tracing, area counting, and image segmentation.
But the algorithm uses recursion to fill neighboring pixels, which can cause stack overflow errors for large images or regions with many pixels. To avoid this, the algorithm can be modified to use an iterative approach or to limit the depth of recursion.
Also, it fills all pixels with the same color connected to the starting point, which can sometimes result in unintended regions being filled if there are gaps in the boundary. This can be overcome by modifying the algorithm to use boundary tracing or other techniques.
Conclusion
Flood Fill Algorithm is widely used in image editing and computer vision. It can be used to fill an area of an image with a specific color, which is useful in image editing applications. In computer vision, it can detect and segment objects based on color.