
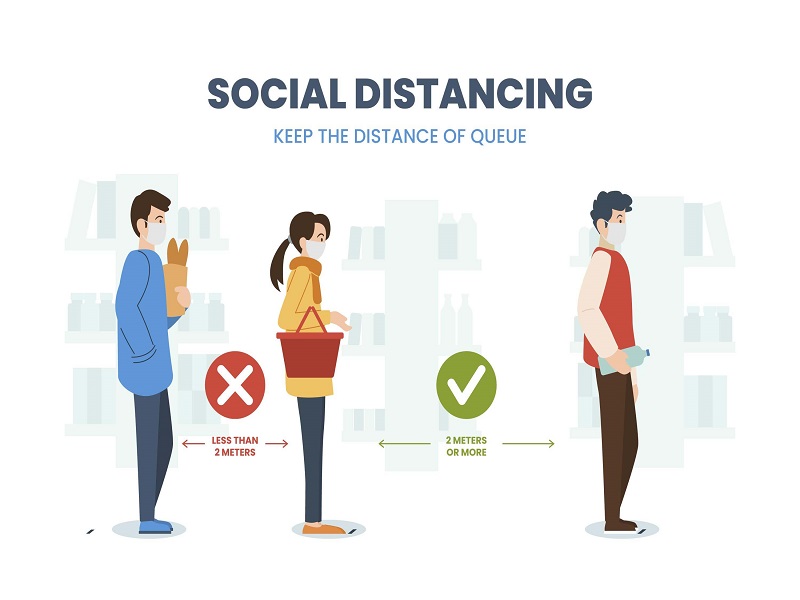
At the time of writing this post in the second week of June in 2020, most countries are coming to terms with the Covid-19 pandemic. After lockdown orders in most countries, people are returning to a different kind of norm. Facemasks are made mandatory and ‘social distancing’ guidelines are encouraged to be followed and even enforced in public places. The term ‘social distance’ refers to staying at a physical distance of about six feet from all other individuals. This limits face-to-face contact with others to prevent and contain the spread of the coronavirus disease.
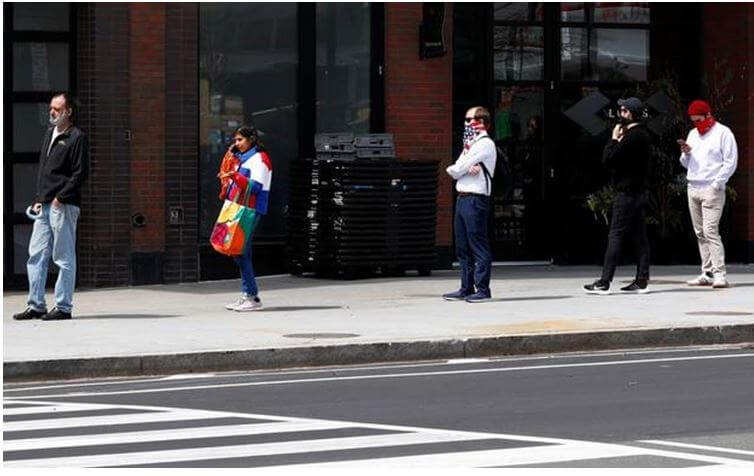
In this post, we will be attempting to use TensorFlow’s object detection package https://www.tensorflow.org/lite/models/object_detection/overview to develop a tool that measures the physical distance between two persons in images. The fundamental idea of this tool is to first detect objects in an image, specifically humans. Second, there should be an algorithmic approach to calculating the distance between the two objects i.e. humans. To implement the code given in this post, it is recommended to execute your code in a Google Colab https://colab.research.google.com/ notebook.
How to Install TensorFlow
TensorFlow is an open-source end-to-end machine learning platform developed by the Google Brain Team. Their research provides state-of-the-art models for developers to work with. In this case, we will be using a pre-trained model for object detection. To get started we need to install the TensorFlow library and download and load the associated models. A sample code notebook to get started with object detection using TensorFlow is provided in the TensorFlow repository itself LINK
In case you are executing code on your local machine, a different installation process should be followed as per the instructions specified in the following LINK Alternatively, you could follow along with this post by executing the code snippets given in a Google Colab environment. Let’s get started.
Install TensorFlow and Pycocotools using the commands given below.
!pip install -U --pre tensorflow=="2.*"
!pip install pycocotools
Next, we will download the models from the TensorFlow Model Garden, which is a repository of a number of different implementations of readily available state-of-the-art models. https://github.com/tensorflow/models These models allow software developers to use well-trained deep learning models in their applications.
import os
import pathlib

if "models" in pathlib.Path.cwd().parts:
  while "models" in pathlib.Path.cwd().parts:
    os.chdir('..')
elif not pathlib.Path('models').exists():
  !git clone --depth 1 https://github.com/tensorflow/models
Lastly, we have to compile the protobufs and install the object detection package.
%%bash
cd models/research/
protoc object_detection/protos/*.proto --python_out=.
pip install .
Protobuf, short for protocol buffers is a data interchange format used by Google. This data is used by TensorFlow to configure the model and the training parameters. On completing the installation process, we can use the TensorFlow models for our object detection use case.
Import the Following Libraries
For this project, we will be making the use of a number of libraries. The list of import statements are given below.
import tensorflow as tf
import numpy as np

from object_detection.utils import label_map_util
from object_detection.utils import visualization_utils as vis_util

import math
from itertools import compress, permutations
from PIL import Image, ImageDraw
The first part of imports are necessary for TensorFlow and handling image data using the numpy library. The second part of imports are a couple of helpful utilities supplied by the object_detection package, for labelling and visualization purposes. The third part is for our computation and image processing purposes. The PIL or Python Imaging Library provides functions to work with images, as we will see further into this post.
Preparing the Model
As mentioned earlier, we will be using a pre-trained deep learning model for our object detection purposes. This model is a neural network model that has undergone training to recognize objects among 80 different classes. In this post, we will be using the SSD with Mobilenet model, a lightweight but fast object detection model. There are many different alternative models available from TensorFlow’s model zoo. Link The code below downloads the model and loads it into a variable detection_model for our use later. You can experiment with other pre-trained models which will have varying speeds and accuracy rates of prediction.
def load_model(model_name):
  base_url = 'http://download.tensorflow.org/models/object_detection/'
  model_file = model_name + '.tar.gz'
  model_dir = tf.keras.utils.get_file(
    fname=model_name,
    origin=base_url + model_file,
    untar=True)

  model_dir = pathlib.Path(model_dir)/"saved_model"

  model = tf.saved_model.load(str(model_dir))
  model = model.signatures['serving_default']

  return model

model_name = 'ssd_mobilenet_v1_coco_2017_11_17'
detection_model = load_model(model_name)
After loading the model, we will also need to prepare a labels set that contains a mapping of numbers to labels. Deep learning models generally output a number which corresponds to a particular label, for example an output of 1 corresponds to a person label in this case. To retrieve these labels, the label mapping is stored in the variable category_index.
PATH_TO_LABELS = 'models/research/object_detection/data/mscoco_label_map.pbtxt'
category_index = label_map_util.create_category_index_from_labelmap(PATH_TO_LABELS, use_display_name=True)
Object Detection Using TensorFlow
At this point, we have installed the dependencies, imported the libraries and prepared the model. Now, we come to the most fundamental part of the post i.e. object detection. We perform object detection on an image by first converting the image into a tensor which is a special data type, part of TensorFlow to handle data. The tensor is then passed to the detection model which returns a dictionary containing the results of detected objects. This result contains the classes of the objects detected by the model, their positions in the image and an accuracy score for each object. We will be using this result to develop our tool. The function for running object detection on an image using a model is given below.
def run_inference_for_single_image(model, image):
  image = np.asarray(image)
  input_tensor = tf.convert_to_tensor(image)
  input_tensor = input_tensor[tf.newaxis,...]

  output_dict = model(input_tensor)

  num_detections = int(output_dict.pop('num_detections'))
  output_dict = {key:value[0, :num_detections].numpy()
                 for key,value in output_dict.items()}
  output_dict['num_detections'] = num_detections

  output_dict['detection_classes'] = output_dict['detection_classes'].astype(np.int64)

  return output_dict
The dictionary output_dict contains four keys – detection_classes, detection_boxes, detection_scores and num_detections. The detection classes correspond to the classes of the detected objects indicated by a number for example, class 1 for person. Detection boxes contain arrays of size 4 indicating the position of the object in the image – ymin, xmin, ymax and xmax. Detection scores correspond to the accuracy of the detection according the model i.e. the probability that the object is detected and classified accurately. And, number of detections corresponds to the total number of objects detected in the image.
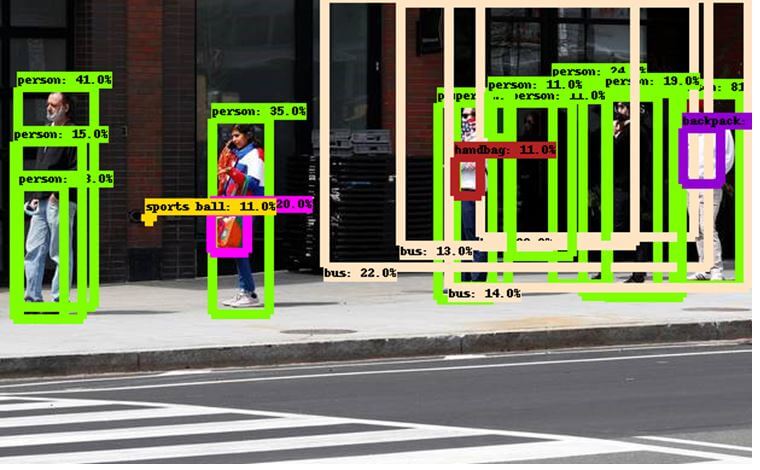
It is not uncommon for the model to find a lot of erroneous or non-existent objects in the image. This is where the score of the detection plays a role. If we do not filter out the predictions on the basis of their scores we end up with extremely incorrect results as seen below.
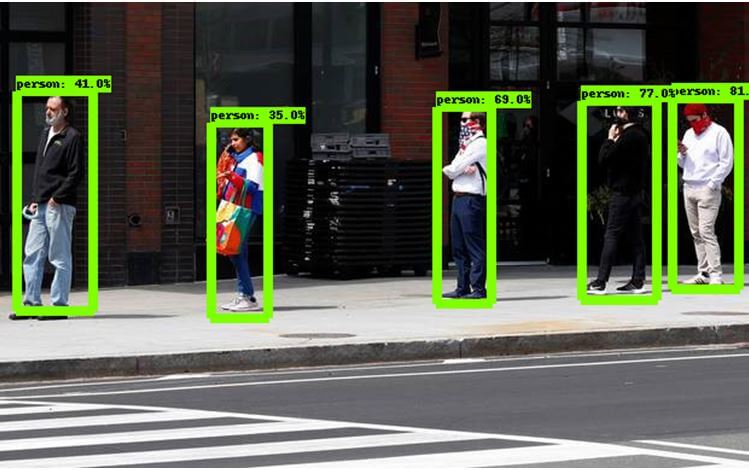
However, by setting a threshold value for the score to consider the detected objects, we can use the more accurate results predicted by the model, as shown below.
Hence, we have completed the object detection part of this application. Next, we need to come up with a way to measure the distance between the people objects in our image.
Calculating Distance between Persons
As mentioned in the introduction, we need to come up with some sort of algorithm that computes the distance between the detected persons in the image. We will be using a method implemented by Daniel Rojas Ugalde to compute these distances. First, we will compute the centroid of the detected box.
def calculate_centroid(bounding_box):
  return (((bounding_box[3]-bounding_box[1])/2)+bounding_box[1],((bounding_box[2]-bounding_box[0])/2)+bounding_box[0])
Next, we have to generate the permutations between all the possible centroids. For example between two centroids A and B, there will be two distances A-B and B-A. The function below takes care to avoid such inverse permutations.
def calculate_permutations(detection_centroids):
  perms = []
  for current_permutation in permutations(detection_centroids, 2):
    if current_permutation[::-1] not in perms:
        perms.append(current_permutation)
  return perms
To calculate the distances between the centroids, the Euclidian distance formula for distance between two points is used. The Euclidian distance formula is used to calculate the distance between two points in the 2D image plane (i.e. X and Y axis).
def calculate_centroid_distances(centroid1,centroid2):
  return  math.sqrt((centroid2[0]-centroid1[0])**2 + (centroid2[1]-centroid1[1])**2)
We use the above Euclidian formula to calculate all the distances between all permutations using the function below.
def calculate_all_distances(centroids):
  distances = []
  for centroid in centroids:
    distances.append(calculate_centroid_distances(centroid[0],centroid[1]))
  return distances
Lastly, to draw lines in the image, the centroids are normalized with respect to the image width and height.
def normalize_centroids(centroids,im_width,im_height):
  newCentroids = []
  for centroid in centroids:
    newCentroids.append((centroid[0]*im_width,centroid[1]*im_height))
  return newCentroids
The five functions above will help us calculate the distances between the objects detected in an image. The functions will be used for creating the social distancing tool in the next part.
Implementing Social Distancing Tool
For the social distancing tool, we will be implementing the logic inside a single function – show_inference_calculating_distance. The entire functionality is given below.
def show_inference_calculating_distance(model, image_path):
  # Setting Parameters
  distance_treshold = 0.2
  person_class = 1
  score_treshold = 0.3

  # Performing Object Detection
  image_np = np.array(Image.open(image_path))
  output_dict = run_inference_for_single_image(model, image_np)

  # Visualizing the Detected Boxes on the Image
  vis_util.visualize_boxes_and_labels_on_image_array(
      image_np,
      output_dict['detection_boxes'],
      output_dict['detection_classes'],
      output_dict['detection_scores'],
      category_index,
      instance_masks=output_dict.get('detection_masks_reframed', None),
      use_normalized_coordinates=True,
      line_thickness=8,
      min_score_thresh=score_treshold)

  # Filter objects belonging to the person class and score above threshold
  boolPersons = output_dict['detection_classes'] == person_class
  boolScores = output_dict['detection_scores'] > score_treshold
  boolCombined = np.logical_and(boolPersons,boolScores)

  output_dict['detection_scores'] = output_dict['detection_scores'][boolCombined]
  output_dict['detection_classes'] = output_dict['detection_classes'][boolCombined]
  output_dict['detection_boxes'] = output_dict['detection_boxes'][boolCombined]
  output_dict['detection_centroids'] = [calculate_centroid(x) for x in output_dict['detection_boxes']]

  # Obtain image width and size for further centroid normalization
  im = Image.fromarray(image_np)
  im_width, im_height = im.size

  # Calculate permutations and distances
  output_dict['detection_permutations'] = calculate_permutations(output_dict['detection_centroids'])
  output_dict['detection_centroids_distances'] = calculate_all_distances(output_dict['detection_permutations'])

  # Filter permutations based on a distance threshold
  boolDistances = np.array(output_dict['detection_centroids_distances']) < distance_treshold
  output_dict['detection_centroids'] = normalize_centroids(output_dict['detection_centroids'],im_width,im_height)
  output_dict['detection_permutations'] = calculate_permutations(output_dict['detection_centroids'])
  output_dict['detection_permutations'] = list(compress(output_dict['detection_permutations'], boolDistances))

  # Draw lines
  draw = ImageDraw.Draw(im)
  for centroid in output_dict['detection_permutations']:
    draw.line((centroid[0],centroid[1]), fill=255, width=3)

  print(output_dict['detection_centroids_distances'])
  display(im)
Let us understand the logic of this function step-by-step:
- First, we set some threshold parameters for consideration. The distance threshold refers to the distance between objects that should be considered safe. In this case anything less than 0.2 is not considered as an appropriate social distance. We set the score threshold to be 0.3 so that only objects greater than a 0.3 accuracy score are considered to be detected objects. We also set the person_class variable equal to the class of the person object, since we are only considering people for distance computations.
- Second, we perform the object detection using the run_inference_for_single_image function implemented earlier in this post.
- Third, we use the utility function to draw the boxes along with the labels and score for the detected objects in the image.
- Next, we filter among the objects to select only the objects of the person class with scores above the threshold. For each person object box, the centroid is computed.
- We then generate the permutations and calculate the distances between the centroids of all the person
- Finally, we filter the permutations based on the distance threshold and draw a line for the permutation which has a distance lower than the threshold. The image with the object boxes and lines is displayed.
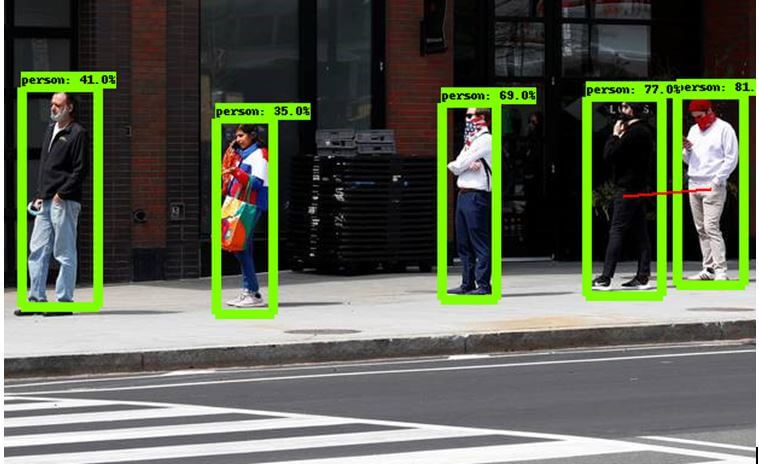
Hence, the function draws a red line between two person objects if the two objects are considered to be too close according to the method used to calculate the distances.
Finally, we call the function above by passing the detection model and the path to a sample image. Make sure you have uploaded the sample image file into Google Colab, before executing the following function call.
show_inference_calculating_distance(detection_model, 'sample_image.jpeg')
Our output shows a red line between the two people on the right hand-side of the image who appear to be standing quite close. Hence, our social distancing tool works, but there is a lot of scope for improvement. You can experiment using your own distance computation algorithm, or threshold values.
Therefore, in this post, we have developed a simple application that extends the TensorFlow object detection package. Such a tool has a lot of potential for development, perhaps by being applied to real-time video feeds from surveillance cameras. In general, the TensorFlow object detection API is an extremely accessible application for object detection tasks including scopes for customization. https://www.tensorflow.org/lite/models/object_detection/overview#customize_model Feel free to explore and develop your own applications. If you ever find yourself stuck with some part of development or some confusion with a concept, we at FavTutor are here to provide you with help from experts 24/7. Get started by sending a message in the chat box below. Happy programming!